Build a dresser by cutting panels, assembling a solid frame, adding drawers, and finishing.
I’ve built many pieces of furniture over the years, and this guide on how to build a dresser will walk you through clear plans, real-life tips, and step-by-step instructions. I’ll show practical choices for materials, tools, joinery, and finishes so you can build a dresser that looks great and lasts. Read on to learn techniques I use, mistakes to avoid, and how to finish like a pro.

Materials and tools you’ll need
Start with good materials and the right tools. For a standard dresser, use 3/4-inch plywood for the carcass and solid wood for the face frame and drawer fronts. Choose hardwoods like oak, maple, or poplar for the face to avoid warping.
Essential tools include a circular saw or table saw, router, drill, pocket-hole jig, sander, clamps, and a tape measure. A good set of clamps makes assembly fast and accurate. Keep spare sandpaper, wood glue, and screws on hand.
How to build a dresser starts with the right supplies. Spend time selecting wood and hardware; this sets the tone for the whole build.
Design and planning
Measure the space where the dresser will live. Decide the height, width, and depth based on your needs. Sketch a simple plan with drawer sizes and the number of drawers.
Think about drawer count and function. Deep drawers for sweaters, shallow ones for socks. Consider adding soft-close slides for a premium feel. Plan for a face frame if you want a traditional look or an inset design for a modern look.
When you plan how to build a dresser well, the cut list and assembly order become simple. I always dry-fit parts on the shop floor to avoid surprises.

Step-by-step build (cutting, assembling, and squaring)
- Cut panels
- Cut the sides, top, bottom, and back from 3/4-inch plywood. Label each piece.
- Cut the shelf or center divider if your design includes it.
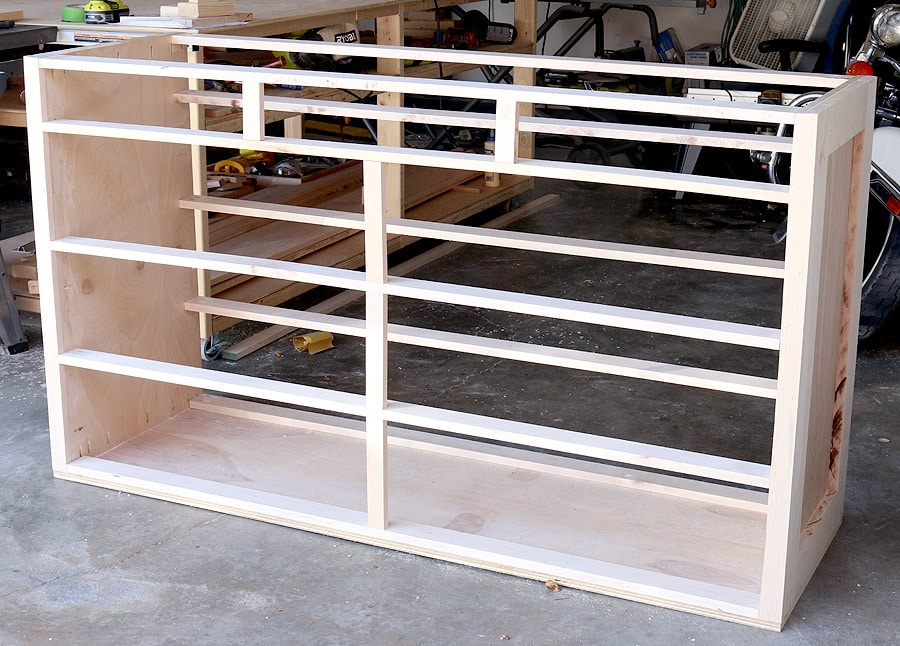
- Build the carcass
- Use pocket holes or dados to join sides to the top and bottom.
- Assemble the carcass on a flat surface. Clamp and check for square using a tape measure across opposite corners.
- Add the back
- Attach a 1/4-inch plywood back with glue and screws or nails. This keeps the box square.
- Fit the face frame or trim
- If you use a face frame, cut stiles and rails from solid wood. Attach with glue and clamps.
- Install drawer slides
- Mark layout lines inside the carcass. Install drawer slides level and true.
- Final check
- Check squareness again and make minor adjustments before sanding and finishing.
I recommend assembling the carcass using clamped pocket holes. It’s fast and strong. When you focus on how to build a dresser, this order of operations keeps the build easy and predictable.
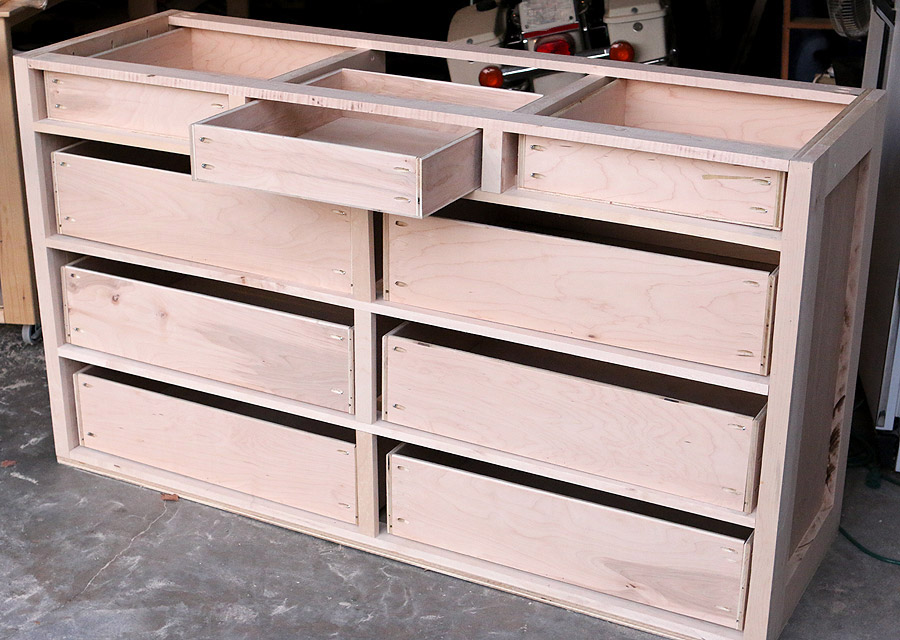
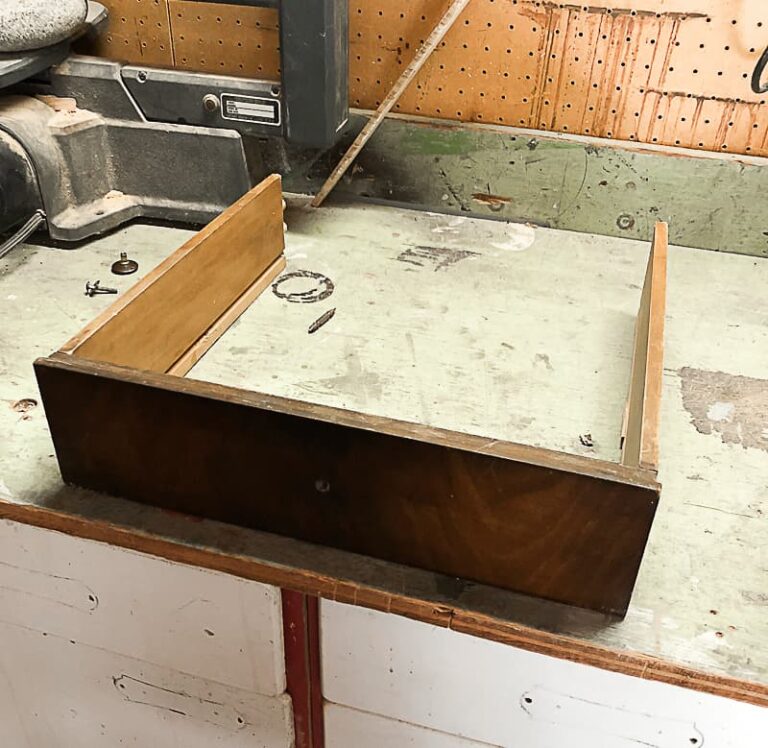
Building the drawers
- Cut drawer boxes
- Use 1/2-inch plywood for sides and bottom, or solid wood for a premium drawer.
- Cut front and back pieces to exact dimensions.
- Join corners
– Use dovetail joints, box joints, or simple butt joints reinforced with glue and screws.
- I often use pocket holes for quick strength on utility drawers.
- Fit drawer bottoms
- Slide the bottom into a groove or glue it on. Leave a little room for wood movement if you use solid wood.
- Sand and fit
- Sand faces smooth. Test each drawer in its opening and adjust for smooth travel.
- Attach drawer fronts
- Clamp fronts in place and screw from inside the box. Allow a 1/16-inch gap around drawer faces for consistent reveal.
How to build a dresser means spending time on drawers because good drawers make the piece feel high quality. My experience shows that properly fitting drawers save a lot of refinement time later.

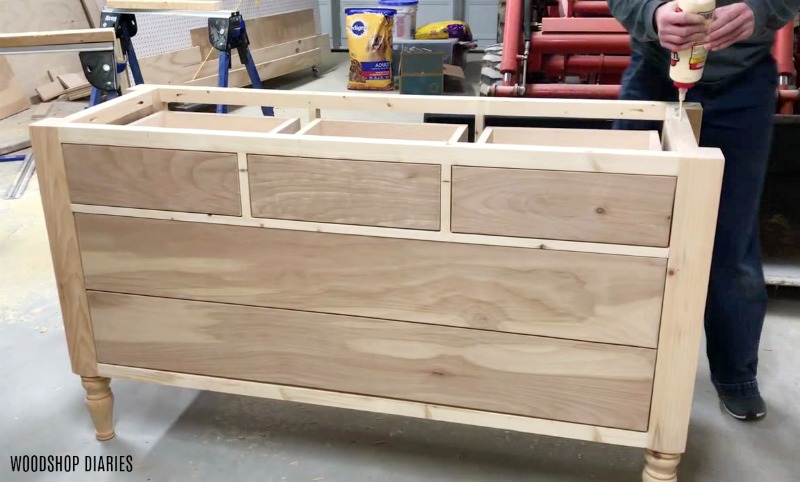
Finishing and hardware
Prepare surfaces by sanding to 120 or 150 grit for plywood and 180 for solid face parts. Wipe down with a tack cloth. Apply wood filler to holes and sand smooth. Test your stain or paint on a scrap piece first.
Choose finish types based on use. For a durable bedroom dresser, use a water-based polyurethane or oil-based finish. For a painted look, use a primer, two coats of paint, and a top coat for durability. Install pulls and knobs last and choose hardware that matches the style.
When learning how to build a dresser, finishing is where the piece comes alive. Small choices in finish and hardware change the feel from amateur to crafted.
Common mistakes and practical tips
- Rushing cuts
- Mistake: Cutting without measuring twice. Tip: Make a clear cut list and label parts immediately.
- Skipping test fits
- Mistake: Assembling without dry-fit. Tip: Always clamp and dry-fit before glue.
- Ignoring grain direction
- Mistake: Matching faces without considering grain or plywood veneer. Tip: Orient veneers for a consistent look.
- Poor drawer spacing
- Mistake: Uneven reveals on drawer fronts. Tip: Use a spacer block to set consistent gap sizes.
- Weak joinery
- Mistake: Relying on nails only. Tip: Use glue plus mechanical fasteners or joinery for strength.
I once built a dresser without a back panel and the box twisted badly. Adding a solid back fixed it. These lessons on how to build a dresser come from real projects and saved me time and money later.

Frequently Asked Questions of how to build a dresser
What is the easiest way to build a dresser?
The easiest way is to build a simple box carcass from plywood, add a face frame, and use pre-made drawer slides. This method reduces complex joinery and delivers solid results.
What wood is best for a DIY dresser?
Use cabinet-grade plywood for the carcass and hardwood for the face frame and drawer fronts. This combo balances cost, stability, and appearance.
How long does it take to build a dresser?
A basic dresser can take a weekend for an experienced DIYer and a few weekends for a beginner. Time varies with complexity, tools, and finishing choices.
Can I make drawers without a drawer slide?
Yes, you can build simple wooden runners or use center guide slides, but modern side-mount or undermount slides offer smoother operation and longevity. Proper fit is key for either method.
Do I need a router for building a dresser?
A router is helpful for cutting dados, grooves, and shaping edges, but you can use table saw dado blades or biscuit joiners as alternatives. A router speeds many tasks and adds clean profiles.
Conclusion
Building a dresser is a rewarding project that teaches measuring, joinery, and finishing skills. Start with a clear plan, choose stable materials, and follow a careful assembly order to avoid common mistakes. Take your time on drawers and finish work to make the piece feel complete and durable.
Try one small dresser project this month. Measure carefully, test-fit often, and enjoy the process—your results will improve fast. If you found this guide helpful, leave a comment with your dresser plans or subscribe for more woodworking projects.